We are reader supported. When you purchase through links on our site, we may earn an affiliate commission. Also, as an Amazon affiliate, we earn from qualifying purchases.
Toe the slab is a simple phrase with a lot of meaning. It is the moment a pitcher takes control of the game, steps onto the pitching rubber, and starts every pitch from a regulated point. If you understand the pitching rubber, you understand the foundation of pitching. This guide walks you through what the rubber is, where it sits, how it shapes rules and mechanics, and how pitchers actually use it. You will see how a small white plate governs fairness, safety, rhythm, deception, and consistency at every level of baseball.
Introduction: Why the Pitching Rubber Matters
Every pitch in organized baseball starts with at least one foot touching the pitching rubber. That small detail is the guardrail for distance, timing, and legality. It standardizes the game for hitters and pitchers and gives officials a clear reference. For players and coaches, it is also a daily tool. It decides angles, pickoffs, and how a pitcher sets up each hitter. If you want to pitch better or teach better, start with the rubber.
The Basics: What Is the Pitching Rubber
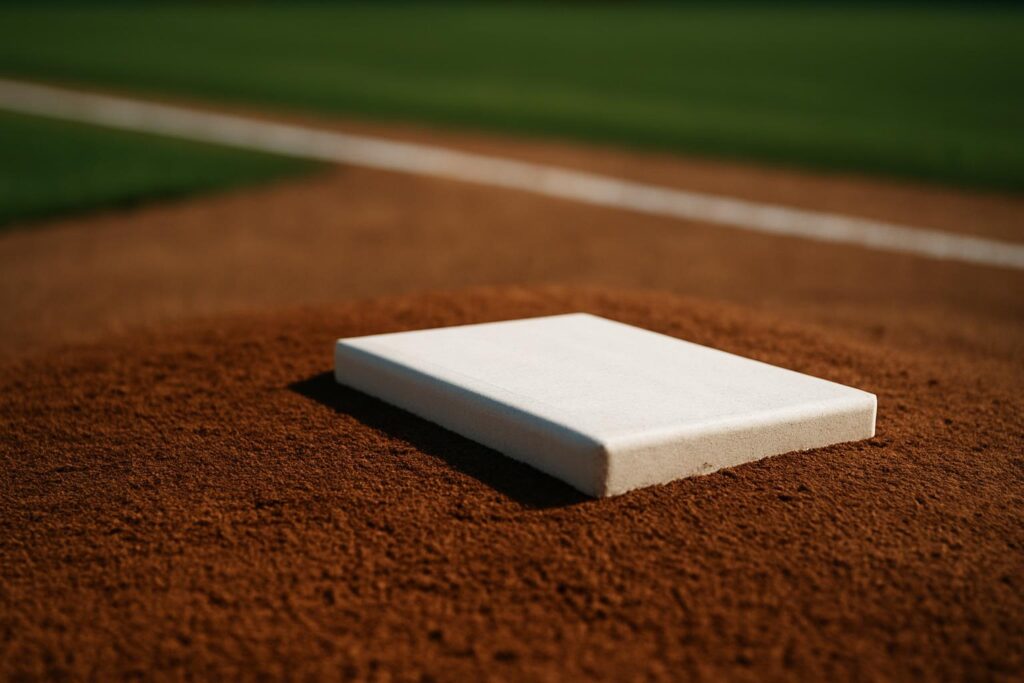
The pitching rubber, also called the pitchers plate or slab, is a rectangular plate made of solid white rubber or a durable composite. It sits on top of the mound, aligned precisely between home plate and second base, flush with the surface so cleats do not catch. In professional and most amateur leagues, it measures 24 inches long and 6 inches wide. The front edge of the rubber is the official point used to measure the distance to home plate.
From the front edge of the rubber to the back point of home plate in professional, college, and high school baseball is 60 feet 6 inches. The rubber is anchored into the mound with a sleeve or bracket so it stays rigid under repeated force. Grounds crews level it, pack clay around it, and check it often.
Mound Geometry: Height, Slope, and Diameter
The mound is not just a pile of dirt. It is a designed platform with clear geometry:
- Height: In professional baseball, the top of the mound is 10 inches above the height of home plate. Many high school and college fields use the same standard.
- Slope: The gradual slope begins in front of the rubber. It drops roughly one inch per foot for several feet toward home plate. This creates a consistent downhill path for the stride and release.
- Diameter: A regulation mound forms a circle about 18 feet across. The rubber sits at the center line of that circle, facing home plate.
Consistency here matters. An uneven mound changes landing spots and stress on the body. The rubber sets the top reference point, and the slope must flow away from it without bumps or lips.
A Short History: From Box to Rubber
Baseball once used a pitchers box instead of a plate, and the throwing distance was shorter. The modern rubber, the raised mound, and the 60 feet 6 inches standard were adopted to balance offense and defense and to standardize mechanics. The rubber made location predictable. It forced pitchers to start from one place every time, which helped hitters recognize timing and umpires judge legality.
Over time, mound height and slope standards tightened. The aim has been the same: a fair distance, a safe incline, and a uniform starting point at every park. That is why you can watch baseball in different stadiums and see a consistent look.
Different Levels, Same Idea
Not every league uses the same distance, but the principle stays the same. Here is how the rubber fits into various levels:
- Professional, college, high school: Rubber size is 24 by 6 inches, distance to home is 60 feet 6 inches, mound height about 10 inches.
- Youth and intermediate leagues: The rubber size often stays the same, but the distance is shorter, such as 46 feet, 50 feet, or 54 feet depending on age group. The mound is lower and sometimes smaller in diameter.
Portable mounds and convertible rubbers are common in youth settings. Some fields install multiple anchor sleeves at different distances. The rubber still anchors every rule and every pitch.
Function and Fairness: Why the Rubber Exists
The pitching rubber does four important jobs:
- Standardizes distance so hitters see a consistent release point.
- Gives pitchers a firm surface to push against for velocity and control.
- Creates a clear legal status. On the rubber means the pitcher is engaged. Off the rubber means the pitcher is a fielder.
- Aligns the game. The rubber is set on a straight line with home plate and second base, so the strike zone and lanes stay true.
Without the rubber, you would have chaos. Timing would vary, pickoff rules would blur, and mechanics would drift.
How To Toe the Slab: Stance and Contact
To pitch legally, a pitcher must engage the rubber with the pivot foot before starting the delivery. The pivot foot is the back foot for most pitchers. Here is a clear baseline for setup:
- Pivot foot in contact with the rubber. The foot can be centered, toward either end, flush, or slightly angled.
- Windup: Start with the pivot foot on the rubber and the free foot off the rubber. The pitcher can step back or side to start.
- Set position: Pivot foot on the rubber, non-pivot foot in front of the rubber, come to a complete stop before the pitch.
This contact is not cosmetic. It locks in distance, controls pickoffs, and gives a predictable base for balance. Pushing against the front edge with the ball of the foot is common because it creates a strong drive line down the slope.
Finding Your Spot on the 24 Inches
The rubber is 24 inches wide, and where you stand on it matters. Small shifts change angles to each side of the plate.
- Right-handed pitchers: Many start on the third-base side of the rubber to gain a better angle on outside pitches to right-handed hitters and to get in on lefties. Some move to the first-base side to attack glove side to lefties.
- Left-handed pitchers: Many prefer the first-base side for angles to same-side hitters. Moving sides can help create better lanes for breaking balls.
- Center: Staying centered can simplify timing, alignment, and command for pitchers who struggle with direction.
The key is consistency. Pick a starting spot on the rubber that matches your pitch mix and your target lanes. If you change sides, do it with a reason and keep your stride line true.
Stride Direction and the Rubber
Your stride should travel in a straight line from the rubber toward your target. Drifting closed or open changes your release point and spin. Use the front edge of the rubber as a reference:
- Trace a mental line from the center of your pivot foot to the center of the plate.
- Land with the front foot slightly closed but aligned to the target.
- Keep the back foot drag light and controlled to maintain direction.
When the stride matches the line of the rubber, command improves and stress on the arm and hip stays manageable.
Legal Use: Rules You Cannot Ignore
The rubber defines what is legal. Here are core points that apply broadly across organized baseball:
- Contact: The pitch starts with the pivot foot in contact with the rubber.
- Set position: Come to a complete stop with hands together before delivering.
- Pickoffs: While engaged with the rubber, you must step directly toward a base to throw. You cannot feint a throw to first base while still on the rubber. Disengage first if you want to fake.
- Disengaging: Step back and separate from the rubber with the pivot foot to become a fielder. Then you can feint or reset freely.
- Quick pitches: Do not rush the pitch while the batter is not reasonably set. Umpires can call this illegal.
Umpires look at the feet. If the pivot foot is not in contact when required, or if the step is not toward a base, you risk a balk with runners on or an illegal pitch with bases empty.
Lefties, Righties, and the Rubber
Left-handed and right-handed pitchers both live on the same 24 inches, but they feel the angles differently.
- Right-handed pitchers often ride the third-base side for sinkers and sliders to righties. The lane feels natural.
- Left-handed pitchers often hug the first-base side to run fastballs away from righties and in to lefties.
- Both sides benefit from small in-game adjustments. A quarter step on the rubber can clean up a miss pattern.
The goal is simple. Use the rubber to line up your best pitches to your best plan against the current hitter.
Pickoffs and Holds From the Rubber
With runners on, the rubber is your anchor for the running game.
- From the set position, vary your hold times without rocking or flinching.
- Step directly to the base on pickoffs while engaged with the rubber. No half steps. No fakes to first while still engaged.
- If you want to fake or reset, disengage with the pivot foot first. Then make your move.
Command the rubber and you control the pace. Panic and you risk a balk and a free base.
Game Mound vs Bullpen Mound
Pitchers often move back and forth between the bullpen and the game mound. The rubber ties the two together, but they can feel different.
- Check distances and heights. Not all practice mounds match the game mound perfectly.
- Use the same starting spot on the rubber in the bullpen that you plan to use in the game.
- Confirm the slope in front of the rubber. A soft or flat landing changes command.
Make a habit of quick checks when you toe the slab. Confirm your pivot foot grabs the front edge cleanly and that your landing area is firm.
Maintenance: Keeping the Slab Pitchable
Day after day, cleats chew holes in front of the rubber. Good maintenance prevents injuries and wildness.
- Pack clay tightly in the pivot hole and landing spot. Use water, packing clay, and a tamper to build a dense surface.
- Level the rubber. If it tilts or settles, pull it, fix the base, and reset it at the correct height and angle.
- Check anchor sleeves. A loose sleeve lets the rubber wobble. Tighten or replace as needed.
- Inspect edges. The top must be flush so toes do not catch.
Teams that invest time around the rubber gain strikes. Consistent footing means consistent release points.
Weather and Safety Around the Rubber
Moisture, heat, and cold all change how the rubber area plays.
- Wet clay turns slick. Add drying agent, re-pack, and tamp to restore traction.
- Dry, dusty clay breaks down. Add water and pack to hold shape.
- Cold hardens the surface. Scuff lightly and add a thin layer of conditioned clay for grip.
If you slip on the push, the ball sails. If you stick in a deep hole, your hip and knee take stress. Fix the surface before you throw full speed.
Mechanics Tied to the Rubber
Great pitching is about repeating a delivery. The rubber gives you anchors and checkpoints:
- Pivot foot pressure: Feel the ball of the foot on the front edge. This starts the chain of power.
- Hip load: Keep the back hip stacked over the pivot foot before you move down the slope.
- Direction: Keep your stride tracking the same line your pivot foot sets on the rubber.
- Release: A stable base under the rubber produces a consistent window out front.
Use simple cues. Same foot angle on the rubber. Same stride line. Same finish. The rubber makes those cues repeatable across innings and parks.
Common Mistakes When Using the Rubber
Most problems near the rubber have simple fixes:
- Drifting open: If your front foot lands to the glove side, start closer to the glove side of the rubber and cue a straighter line.
- Landing across: If your front foot crosses your line, slow down the upper body early and firm up the pivot foot push.
- Fishing for edges: If you miss arm side repeatedly, shift your starting spot a few inches toward the arm side and keep your eyes centered on the target.
- Pivot hole collapse: If the hole is deep, stop and fill it. Mechanics will not hold over a crater.
Drills You Can Do Right on the Slab
Dry Contact Reps
Stand on the rubber with your pivot foot and rehearse your first move without a ball. Focus on feeling the front edge under the ball of the foot. Repeat 10 to 15 reps before each outing.
Line Drill
Lay a strip or imagine a line from the center of the rubber to the center of the plate. Throw fastballs while trying to land your front foot on that line. Build direction before you add breaking balls.
Towel or Shortbox Work
Use a towel or shortened distance with a catcher. The goal is to keep the same start spot on the rubber and the same stride line at reduced intensity. This builds repeatability without wear.
Catcher and Umpire Considerations
The catcher depends on your consistency on the rubber. If you change sides, communicate so target lanes match. Umpires watch your feet for legality. Clear pivot foot contact, a full stop in the set position, and direct steps on pickoffs keep calls in your favor.
Equipment Tips: Cleats and the Rubber
Cleats interact with the surface you push from. Choose and maintain them with the rubber in mind:
- Keep studs even. Worn inside studs can cause the pivot foot to roll.
- Clean clay from the soles between innings so traction stays consistent.
- If the rubber area is firm, sharper studs help. If it is soft, a wider base and even pressure work better.
Your shoes are part of the system that starts at the rubber and ends at the plate.
Portable Mounds and Convertible Rubbers
Many youth fields use portable mounds or multipurpose fields. In these cases:
- Confirm the rubber distance before games and bullpens.
- Check that the rubber is flush and does not rock on the frame.
- Pack clay blocks around the rubber face so the push-off area does not crumble.
Some rubbers have multiple anchor holes so they can be rotated as edges wear. Rotating keeps the top flat and extends the life of the plate.
Using the Rubber for Pitch Design
Small changes on the rubber can support different pitch shapes:
- Glove-side breaking balls: Start slightly toward the arm side of the rubber and hold a firmer line into the break.
- Two-seam and sinker: Start on the glove-side end to give the ball room to run back to the edge.
- Backdoor cutters: Start on the arm-side end so the ball works across the plate late.
Do not chase big moves. One to three inches on the rubber is enough to alter lanes without disrupting timing.
Game Management: Routine on the Slab
A repeatable routine eases nerves and tightens command:
- Step on the rubber with the same foot every time.
- Set your pivot foot in the same spot and feel the front edge.
- Take a single breath, get the sign, and commit to the target.
The rubber is your cue to reset. Use it to clear the last pitch and focus on the next one.
Coaching Checkpoints at the Rubber
For coaches, a few quick looks tell you a lot:
- Is the pivot foot on the rubber and angled consistently
- Does the stride land on a straight line from the rubber to the target
- Is the pitcher stopping fully in the set position
- Are pickoff steps direct and legal
- Is the clay packed in front of the rubber
Fix these and performance improves without changing the entire delivery.
Troubleshooting by Symptom
- High arm-side misses: Check if the pivot foot is slipping off the front edge. Repack clay and firm up contact.
- Glove-side yanks: Check if the pivot foot is rotated too far open on the rubber. Square it a few degrees.
- Inconsistent velocity: Check if the first move is soft. Cue an aggressive push from the front edge of the rubber.
- Frequent balks: Review set position stops and pickoff steps. Reset the routine to slow the upper body and clarify the feet.
Conclusion: Master the Slab, Master Your Start
The pitching rubber looks simple, but it controls distance, rules, and mechanics. It anchors fair play across ballparks and age groups. For pitchers, the rubber is a tool. It guides angles, powers the stride, and stabilizes release. For coaches and grounds crews, it is a checkpoint and a maintenance focus. If you toe the slab with purpose, you simplify your delivery, reduce mistakes, and gain the strike zone. Start every outing by owning those 24 inches, and the rest of the game falls into place.
FAQ
Q: What are the standard dimensions of the pitching rubber
A: The pitching rubber is typically 24 inches long and 6 inches wide, made of white rubber or a similar composite.
Q: How far is the pitching rubber from home plate
A: In professional, college, and high school baseball, the distance from the front edge of the rubber to the back point of home plate is 60 feet 6 inches.
Q: Does it matter where a pitcher stands on the rubber
A: Yes. Small shifts along the 24 inches change angles to each side of the plate and can help match pitch shapes to target lanes.
Q: What is required to be legal when pitching from the set position
A: The pivot foot must be in contact with the rubber, the pitcher must come to a complete stop, and any pickoff while engaged must include a direct step to the base.
Q: Can a pitcher fake a throw to first base while on the rubber
A: No. A pitcher cannot feint a throw to first base while engaged with the rubber and must disengage first to fake.